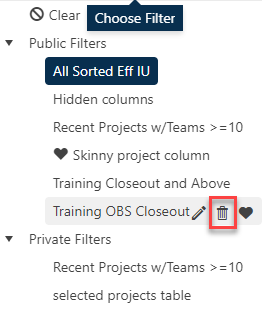
To display a previously saved filter, simply click the Choose Filter selector to open the control. A list of previously saved filters appears. If a saved filter is currently being displayed, its name will appear at the top of the list in the grey title bar and the item will be highlighted in dark blue in the list. The first item in the list will be “Clear” – clicking this item clears the current filter, the control closes, and the name of the current filter changes to “Unfiltered”.
By default, both Public and Private folders in the list are fully expanded. If the list of saved filters is too long, use the scrollbar or collapse the Private or Public folders to hide parts of the list. Collapsed folders will be remembered the next time you open the control.

To see the filter description (if any) simply rest your cursor over a filter. Once you have decided which filter you want to display, simply select it. The drop-down list will close and the text in the control will now reflect the selected filter title and (in parentheses) the public or private status of the selected filter.

Indicators and column hover tips for the currently
displayed filter will appear in the filter, sort, custom column, and group
indicators on the project list.

Remember: because project access settings and
permissions vary, different users displaying the same filter will often see
different projects. The ability to view any given project is determined by
factors such as the user’s service-level permissions and primary responsibility,
project access, or OBS Node settings for the project.