When creating a new estimation project, if you select
Feasibility or Estimation from the Create New Project from Template
icon’s drop-down list of project types you will be taken to the Edit
Estimate project multi-tabbed dialog (in the foreground) with the
Assumptions tab displayed. Objects in the background (the dashboard, which
will be blank until your first solution has been created), the project toolbar
(top right) and the SLIM-Collaborate main menu (top bar, in navy blue) are all
greyed out. You will not be able to access any of these features until you
exit the Edit Estimate Project dialog by clicking OK to accept the
current inputs or Cancel to discard any edits and return to the main
project page and dashboard.
Here are the main elements you should
understand:
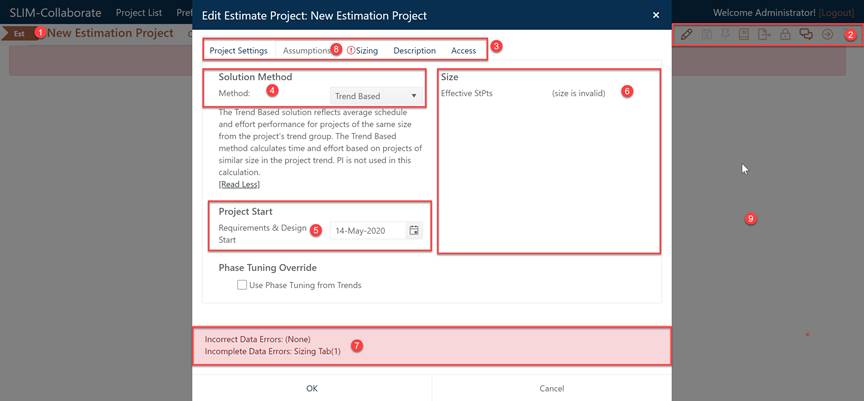
1. Project Name. This is the name you supplied when you created the project. It appears on the left-hand side of the project toolbar and in the title bar of the Edit Estimate Project multi-tabbed dialog.
2. Project Toolbar. Located on the right-hand side of the project toolbar are icons used to initiate various project actions (saving or logging solutions, cloning a project, exporting or checking out projects to SLIM-Estimate, adding notes, advancing the estimate to the closeout stage, or launching an external call). The project toolbar is not available (greyed out) until you exit the Edit Estimate Project dialog.
3. Project Settings Tabs. The Edit Estimate dialog groups project settings and estimation inputs into related categories, each with its own data entry tab (Project Settings, Assumptions, Sizing, Description, and project Access).
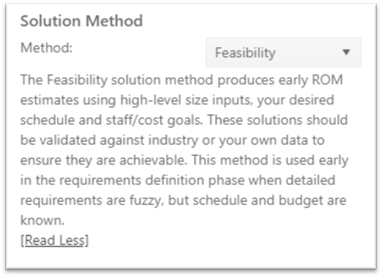
4. Solution Method. This drop-down list allows you to select various solution methods, each of which requires different inputs. When you select a solution method, two things happen:
a. The label field below the solution method list control displays descriptive text to help you understand the purpose and uses of each method.
b. The right-hand side of the Assumptions tab (see number 6 in the illustration) updates to show the inputs required to use each solution method.
5. Project Start. Use this field to specify the date on which the first included lifecycle phase begins. The name of the first included phase appears to the left of the date/calendar control. It defaults to the current date for new estimates.
6. Solution Inputs. This section of the Assumptions dialog updates each time a different solution method is selected to show only the required inputs for the current method. Hover tips supply help text describing each field.
7. Error Bar. A pink bar across the bottom of the Edit Estimate dialog highlights incorrect inputs (those falling outside the acceptable range for each field) as well as incomplete (missing) data. To help you locate and correct errors, a red exclamation point inside a circle is also displayed before any data entry tab containing errors. Note that you can OK to exit the edit dialog with incomplete (missing) data errors, but you will NOT be allowed to OK and exit until you correct any incorrect (out of range) data errors.
8. Error Symbol. In the illustration above, the Sizing tab has an error symbol (red exclamation point inside a circle) that corresponds to the text in the Error Bar:
Incomplete Data Errors: Sizing Tab (1).
9.
OK/Cancel buttons. Click the OK button to exit the Edit Estimate
Project dialog and accept any edits you performed. Cancel exits without saving
your changes. The OK button will be enabled whenever there are no
incorrect (invalid or out of range) data errors. Incomplete data errors will not
prevent you from using the OK button, but a pink error banner on the project
dashboard will alert you to the current status of the solution and
project.